Tyranid Fast Attack Summary
Shrikes
 "Shrikes are, obviously, very similar to Warriors in a lot of respects.
Aside from a few key facets, the units are essentially identical. But
where Warriors are ideally placed in the backfield as a cheap
scoring Synapse unit, Shrikes are definitely your midfield aggressors
and Synapse beacons. This is because Shrikes exchange a 4+ armour save
for jump infantry classification, a change that - as well as being
unable to score in five out of six missions - narrows them into being a
more aggressive unit. If you want Shrikes that sit back and protect your
medium to long ranged units, such as Exocrines and Biovores, you may as
well just employ Warriors who are tougher and can score in every
mission where objectives are used. Why waste the advantages of a unit to
try and shoe-horn them into a role that another unit performs better
in? This is why I see the main usage of Shrikes to be as a mobile
Synapse unit in the same vein as a flying Hive Tyrant, providing that
pivotal element of control to your Gargoyles, Raveners, Harpies and
Crones. If you are using a highly mobile and aggressive force, Shrikes
are the logical fit as additional Synapse units to play off of your HQ
choices.
"Shrikes are, obviously, very similar to Warriors in a lot of respects.
Aside from a few key facets, the units are essentially identical. But
where Warriors are ideally placed in the backfield as a cheap
scoring Synapse unit, Shrikes are definitely your midfield aggressors
and Synapse beacons. This is because Shrikes exchange a 4+ armour save
for jump infantry classification, a change that - as well as being
unable to score in five out of six missions - narrows them into being a
more aggressive unit. If you want Shrikes that sit back and protect your
medium to long ranged units, such as Exocrines and Biovores, you may as
well just employ Warriors who are tougher and can score in every
mission where objectives are used. Why waste the advantages of a unit to
try and shoe-horn them into a role that another unit performs better
in? This is why I see the main usage of Shrikes to be as a mobile
Synapse unit in the same vein as a flying Hive Tyrant, providing that
pivotal element of control to your Gargoyles, Raveners, Harpies and
Crones. If you are using a highly mobile and aggressive force, Shrikes
are the logical fit as additional Synapse units to play off of your HQ
choices.Unlike Trygon Primes who are more reliant on Deep Striking in the enemy backfield and providing Synapse to units in about the turn three onwards range, Shrikes are there from the start moving up the field with your other units. They can keep the swarm in check even if your flying Hive Tyrants are killed, something that Trygon Primes can't do nearly as well if your force is mostly composed of jump infantry and beasts - or even Hormagaunts. There's no real reason to take Shrikes if you don't want them to fulfill this kind of role in a highly aggressive list, as Warriors and Zoanthropes are more than serviceable enough in the job for slower, more cautious lists. While I do prefer the latter kind of army list nowadays, the former does have its place and this is where Shrikes belong. Keep them cheap with devourers, some rending claws and a barbed strangler or venom cannon, and move them in support of your Gargoyles and Crones. Put light ranged pressure on units you wish to focus down and try to set up combo-charges with your other units, as even stock Shrikes are very nasty on the charge."
You can read more about Shrikes here.
Raveners and the Red Terror
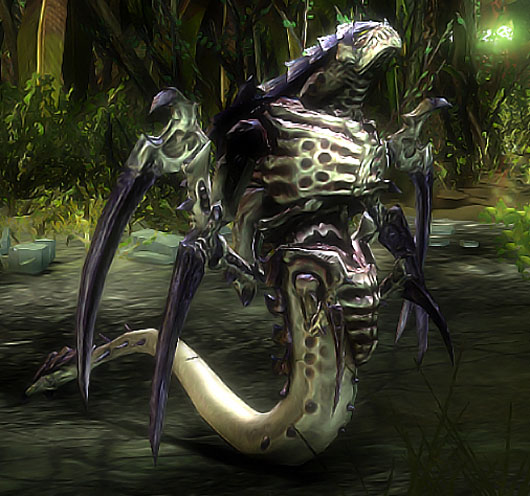
Against a team of 12 Fire Warriors for example, factoring in Overwatch, a brood of six Raveners will be cut down to five - even with no proper shooting accounted for. From there, assuming the Raveners did not charge through or into terrain, they will strike first with a whopping 25 Strength 4 attacks hitting on 3s, wounding on 3s and forcing a 4+ armour save. If we round up each number, that is 9 misses, 5 failed wounds for a total of 11 wounds inflicted, leading to about 6 failed armour saves. The Fire Warriors hit back with 6 attacks, hitting on 5s and wounding on 5s, leading to two hits and maybe one unsaved wound total. Just like that, the Fire Warriors have lost by five or six and, on base Leadership 7, are incredibly likely to run away unless affected by the Stubborn bubble of an Ethereal - which would be counter-intuitive for the Tau player in this situation. Against a ten-strong Space Marine Tactical Squad, a similar result occurs, though we will throw in Rending Claws on each Ravener to make up the sizable points difference between the two test subject squads. We get Overwatch, and that sixth Ravener survives due to Strength 4 and not Strength 5 shooting directed at it. From there, again assuming no terrain in the charge, the Raveners strike first with 30 attacks this time, hitting on 3s and wounding on 4s with 6s leading to Rending wounds. This is about 20 hits, 10 wounds - roughly three of which are Rending - for seven armour saves on a 3+. That should be about two failed, for five dead Tactical Marines. The other five strike back with five attacks - assuming no Veteran Sergeant - for three hits, one or two wounds for a dead Ravener. Bam, the Tacticals lose by 4 or 3, reducing them to Leadership 4 or 5 respectively. Another combat where the Space Marines are likely to flee, but unlike the Fire Warriors which the Raveners could at least wipe out through Sweeping Advance, the Tacticals with And They Shall Know No Fear will automatically regroup and proceed to blast the Raveners to bits even without friendly support.
Granted, these combats are against painfully mediocre or sub-par units in close combat, but these are the basic Troops of enemy armies, the kind of units Raveners are designed to punish - much like how Assault Squads are really built for hunting scoring units. Raveners don't have the survivability or stats to really take on most dedicated combat units without getting annihilated in turn, and the cost of upgrading each Ravener to have Rending Claws alone is expensive enough as it is. But you absolutely can't afford to take just three Raveners as they are too darn easy to kill. It's a hard balance to strike, and one that I think leads me to prefer Deep Striking units. Yes, Interceptor shooting can murder them, but at least it can force the shooting unit to focus on a cheap ~100 point units instead of your more valuable Synapse units and Troops. Three with Spinefists put out 9 twin-linked Strength 3 shots when they arrive, enough to be a nuisance against your typical Pathfinder unit and kill a few. From there, your opponent can either go for the cheap Ravener unit and not your Synapse lynchpins, or they can ignore them - or put light resistance against them - and watch as that small Ravener unit carves up light infantry squads with ease. Ultimately, this is the use of Raveners I feel makes the most sense; the 12" range of Spinefists is equivalent to their possible Deep Strike scatter, and the shooting is light enough that you won't worry too much if they can't fire when they arrive. A small unit is still very capable of tearing through medium sized typical scoring units, while they can tie up all manner of enemies for at least a few turns - once they are in combat, they probably won't be losing it and thus won't even be bothered by a lack of Synapse. But that's just the problem, isn't it? This plan can be ruined if you don't manage to get a Synapse unit near them the turn after they arrive, as Instinctive Behaviour on Leadership 6 will likely see them gaining the Stupidity special rule - oh, wrong game! At that point, as it would be turn three minimum when this would occur, your flying Hive Tyrants and Trygon Primes - if any - should be nearby at this point. Of course, it would be awesome if they could be left to their own devices, but ah well."
You can read more about Raveners and the Red Terror here.
Sky Slasher Swarms
 "Unfortunately I'm even less of a fan of Sky Slashers than Ripper Swarms
simply because they want to be the more aggressive unit but still lack
the means to do so without getting squashed. These are even more
expensive Toughness 3 tarpit units with nothing to really save them from
getting splotched by a Serpent Shield or stray Missile Pod shot. The
best uses of Ripper Swarms are strangely enough still evident here;
keeping them as small three-base-strong tarpits to hide behind monsters
and Aegis Defence Lines as cheap Fearless interdiction units, or as
small annoying Deep Striking units. They might be Jump Infantry, sure,
and they pay a lot for it, but are they really paying for something they
want or need? Ultimately, they are as easy to kill as Rippers, are
easier to see because the models are higher up and still don't want to
be used in combat except as a tarpit. As Hormagaunts, Termagants and
Gargoyles are much better for front-line tarpit, scoring - and generally
being useful - duties, Rippers and Sky Slashers are there for your
Exocrines, Hive Guard and Biovores, the kind of units that sit at long
to medium range. So where does that leave Sky Slashers? Unfortunately,
in the same situation as Rippers, save that they are more expensive. If
Gargoyles didn't exist, they might have a role as a flying tarpit, but
as Gargoyles do exist, Sky Slashers are one step short of being rendered
null and pointless. If you want Sky Slashers for a flying tarpit, just
take three Gargoyles instead. With that in mind, use them the same way
you do Rippers with the exception that as a Deep Striking unit they can
move 12" on that subsequent turn."
"Unfortunately I'm even less of a fan of Sky Slashers than Ripper Swarms
simply because they want to be the more aggressive unit but still lack
the means to do so without getting squashed. These are even more
expensive Toughness 3 tarpit units with nothing to really save them from
getting splotched by a Serpent Shield or stray Missile Pod shot. The
best uses of Ripper Swarms are strangely enough still evident here;
keeping them as small three-base-strong tarpits to hide behind monsters
and Aegis Defence Lines as cheap Fearless interdiction units, or as
small annoying Deep Striking units. They might be Jump Infantry, sure,
and they pay a lot for it, but are they really paying for something they
want or need? Ultimately, they are as easy to kill as Rippers, are
easier to see because the models are higher up and still don't want to
be used in combat except as a tarpit. As Hormagaunts, Termagants and
Gargoyles are much better for front-line tarpit, scoring - and generally
being useful - duties, Rippers and Sky Slashers are there for your
Exocrines, Hive Guard and Biovores, the kind of units that sit at long
to medium range. So where does that leave Sky Slashers? Unfortunately,
in the same situation as Rippers, save that they are more expensive. If
Gargoyles didn't exist, they might have a role as a flying tarpit, but
as Gargoyles do exist, Sky Slashers are one step short of being rendered
null and pointless. If you want Sky Slashers for a flying tarpit, just
take three Gargoyles instead. With that in mind, use them the same way
you do Rippers with the exception that as a Deep Striking unit they can
move 12" on that subsequent turn."You can read more about Sky Slasher Swarms here.
Gargoyles
 "I'm honestly in the school of thought that you should leave Gargoyles
bare, run them in pretty large squads to make full use of just how cost
effective they are and just flood the board with even more horde units
from the Fast Attack slot. Each upgrade they can take is a third of
their total points cost and as Gargoyles are pretty much your best or
second best tarpit unit overall due to their high mobility and cost, I
think leaving them bare is the right idea. Toxin Sacs give them a great
melee boost, but waste their Blinding Venom. Adrenal Glands are nice for
both Fleet and Strength 4 attacks, but the inability to combine Furious
Charge with Hammer of Wrath and Blinding Venom is a downer. Besides,
Fleet isn't as necessary for a unit that is mostly about protecting
another unit rather than necessarily getting into combat. Make the most
of the fact that they are effectively Termagants with wings and a
surprisingly nasty combo-charge ability in Blind Venom for a mere few
points more per model by running them in large units in conjunction with
flying monstrous creatures or Shrikes. Aim them at nasty units or weak
units; either way, once you hit Blinding Venom off, that unit will be
incredibly easy prey for any of your proper dedicated assault units.
They just naturally fit as the protectors of Shrikes or flying Hive
Tyrants in particular, providing much needed cover to those units,
acting as a tarpit and move-blocker against nasty opposing flying
monsters, and they are just a generally cheap and cost effective unit.
They do decent damage at short range in either the shooting phase or the
assault phase, and when they reduce a unit to Weapon Skill 1 through
massed Blind attacks they will probably make their points back from how
easy it makes combat for something like a Haruspex. The reality is that
as long as they are kept in Synapse range, Gargoyles rank up with
Termagants as one of the most cost-effective units in the codex and
should be one of your main priorities to employ as a Tyranid player.
They can fight many units very well, they are a great tarpit, they are
fast, cover gives them good survivability and their Blinding Venom gives
them additional support capabilities."
"I'm honestly in the school of thought that you should leave Gargoyles
bare, run them in pretty large squads to make full use of just how cost
effective they are and just flood the board with even more horde units
from the Fast Attack slot. Each upgrade they can take is a third of
their total points cost and as Gargoyles are pretty much your best or
second best tarpit unit overall due to their high mobility and cost, I
think leaving them bare is the right idea. Toxin Sacs give them a great
melee boost, but waste their Blinding Venom. Adrenal Glands are nice for
both Fleet and Strength 4 attacks, but the inability to combine Furious
Charge with Hammer of Wrath and Blinding Venom is a downer. Besides,
Fleet isn't as necessary for a unit that is mostly about protecting
another unit rather than necessarily getting into combat. Make the most
of the fact that they are effectively Termagants with wings and a
surprisingly nasty combo-charge ability in Blind Venom for a mere few
points more per model by running them in large units in conjunction with
flying monstrous creatures or Shrikes. Aim them at nasty units or weak
units; either way, once you hit Blinding Venom off, that unit will be
incredibly easy prey for any of your proper dedicated assault units.
They just naturally fit as the protectors of Shrikes or flying Hive
Tyrants in particular, providing much needed cover to those units,
acting as a tarpit and move-blocker against nasty opposing flying
monsters, and they are just a generally cheap and cost effective unit.
They do decent damage at short range in either the shooting phase or the
assault phase, and when they reduce a unit to Weapon Skill 1 through
massed Blind attacks they will probably make their points back from how
easy it makes combat for something like a Haruspex. The reality is that
as long as they are kept in Synapse range, Gargoyles rank up with
Termagants as one of the most cost-effective units in the codex and
should be one of your main priorities to employ as a Tyranid player.
They can fight many units very well, they are a great tarpit, they are
fast, cover gives them good survivability and their Blinding Venom gives
them additional support capabilities."You can read more about Gargoyles here.
Harpies
 "I see the best use of Harpies is less as a one or two-off unit that you
throw into any army list, but as support for your Flying Hive Tyrants.
Harpies have Leadership 10 and are thus not really worried about
Instinctive Behaviour, but one or two flying monstrous creatures can be
taken down pretty easily. Take five - two of which are key Synapse
creatures - though, and all of a sudden any typical list, even many
competitive ones, is going to be struggling to get rid of twenty-three
Toughness 5-6 4+-3+ armoured wounds that can only be hit regularly by
Skyfire weapons. The best part about Harpies is that they are cheap,
giving you the most inexpensive flying monstrous creature in the game
that is fully capable and ready without any upgrades, unlike a Daemon
Prince for example. You don't need to put any points into them - maybe
exchange the Stranglethorn Cannon for a Heavy Venom Cannon and that is
it - for them to be an effective unit, one that adds a lot of
versatility to your army. You can use them to clear out small scoring
units, tie up Devastator and Pathfinder equivalents and even Smash a
vehicle to pieces. They are also a naturally Fearless unit, so getting
into combat with a nasty ranged unit that can't do too much to a
Toughness 5 monster in combat is also a nice use of the Harpy. If you
are worried about being pelted by massed small arms fire that is
actually deceptively dangerous for a Harpy, keep at range; you have
either a Stranglethorn Cannon or a Heavy Venom Cannon, so make use of
their 36" range! Otherwise, give this thing a Heavy Venom Cannon, use it
in conjunction with a whole bunch of other flying monstrous creatures
and go nuts. It can destroy vehicles - though I would avoid Walkers with
power fists - at range pretty effectively or much easier in combat, it
can do a lot of damage to most units at range but often more-so when it
is close enough to do a bombing run. The Harpy works best at short range
due to its increasing damage output and potential with melee attacks
and Vector Strikes, though its minimum 12" move means that unlike
vehicular flyers you are pretty free to go where you want and sit back
if necessary."
"I see the best use of Harpies is less as a one or two-off unit that you
throw into any army list, but as support for your Flying Hive Tyrants.
Harpies have Leadership 10 and are thus not really worried about
Instinctive Behaviour, but one or two flying monstrous creatures can be
taken down pretty easily. Take five - two of which are key Synapse
creatures - though, and all of a sudden any typical list, even many
competitive ones, is going to be struggling to get rid of twenty-three
Toughness 5-6 4+-3+ armoured wounds that can only be hit regularly by
Skyfire weapons. The best part about Harpies is that they are cheap,
giving you the most inexpensive flying monstrous creature in the game
that is fully capable and ready without any upgrades, unlike a Daemon
Prince for example. You don't need to put any points into them - maybe
exchange the Stranglethorn Cannon for a Heavy Venom Cannon and that is
it - for them to be an effective unit, one that adds a lot of
versatility to your army. You can use them to clear out small scoring
units, tie up Devastator and Pathfinder equivalents and even Smash a
vehicle to pieces. They are also a naturally Fearless unit, so getting
into combat with a nasty ranged unit that can't do too much to a
Toughness 5 monster in combat is also a nice use of the Harpy. If you
are worried about being pelted by massed small arms fire that is
actually deceptively dangerous for a Harpy, keep at range; you have
either a Stranglethorn Cannon or a Heavy Venom Cannon, so make use of
their 36" range! Otherwise, give this thing a Heavy Venom Cannon, use it
in conjunction with a whole bunch of other flying monstrous creatures
and go nuts. It can destroy vehicles - though I would avoid Walkers with
power fists - at range pretty effectively or much easier in combat, it
can do a lot of damage to most units at range but often more-so when it
is close enough to do a bombing run. The Harpy works best at short range
due to its increasing damage output and potential with melee attacks
and Vector Strikes, though its minimum 12" move means that unlike
vehicular flyers you are pretty free to go where you want and sit back
if necessary."You can read more about Harpies here.
Hive Crones
 "Again, the Crone is well suited to a support role and for clearing out
your enemies' smaller infantry units in combat. A Crone, with Smash, can
destroy light to medium vehicles - though walkers with power fists
should be avoided - and take on five strong or less infantry units
equivalent to Tactical Marines, though it can take on larger units of
Fire Warriors or Eldar Guardians pretty effectively. Use its Vector
Strike against AV12 side armour or lower vehicles and Toughness 4
multiple wound models - like Crisis Teams and medium-sized Tyranids -
and the Drool Cannon to mop up squads of 4+ armoured infantry. The
Tentaclids should be reserved for heavy vehicles with side armour
thirteen or higher where your Vector Strike becomes inefficient, or for
flyers that can also be dealt with through the Vector Strike. All of
this makes the Crone an unparalleled monster in terms of versatility in
the Tyranid codex, and it is darn cheap to boot. Ideally, a standard
Tyranid list with Exocrines, Tyrannofexes, other Harpies and Crones and
so on is suited for massacring light to medium infantry in droves, which
means your Crones are better left for vehicle hunting, something the
rest of the army struggles with at long range. Use the Tentaclids as one
of the Hive Fleets' best defences against flyers and AV14 vehicles, but
always try and Vector Strike wherever possible without dangerously
exposing the Crone itself. I prefer not to take too many risks with
these things and move up into advanced cover in the first turn,
preparing for a "fly-by" on the second turn and onwards. Many opponents
will expect you to try and Vector Strike on turn one and attempt to
counter that with their own flyers and unit positioning, so don't fall
for the bait and instead disillusion them by doing it in the turn you
prefer. The Crone may lack the support capabilities of a Harpy when
making a charge, but it nonetheless makes up for it in offensive
prowess; if you do have four or more flying monstrous creatures, don't
be afraid of aggression. I still recommend using the first turn to get
into position so as to not over-extend and end up in the sights of all
the enemies' guns, but if it means sacrificing a cheap monster so the
rest of your swarm can advance unharmed, it may be worth it."
"Again, the Crone is well suited to a support role and for clearing out
your enemies' smaller infantry units in combat. A Crone, with Smash, can
destroy light to medium vehicles - though walkers with power fists
should be avoided - and take on five strong or less infantry units
equivalent to Tactical Marines, though it can take on larger units of
Fire Warriors or Eldar Guardians pretty effectively. Use its Vector
Strike against AV12 side armour or lower vehicles and Toughness 4
multiple wound models - like Crisis Teams and medium-sized Tyranids -
and the Drool Cannon to mop up squads of 4+ armoured infantry. The
Tentaclids should be reserved for heavy vehicles with side armour
thirteen or higher where your Vector Strike becomes inefficient, or for
flyers that can also be dealt with through the Vector Strike. All of
this makes the Crone an unparalleled monster in terms of versatility in
the Tyranid codex, and it is darn cheap to boot. Ideally, a standard
Tyranid list with Exocrines, Tyrannofexes, other Harpies and Crones and
so on is suited for massacring light to medium infantry in droves, which
means your Crones are better left for vehicle hunting, something the
rest of the army struggles with at long range. Use the Tentaclids as one
of the Hive Fleets' best defences against flyers and AV14 vehicles, but
always try and Vector Strike wherever possible without dangerously
exposing the Crone itself. I prefer not to take too many risks with
these things and move up into advanced cover in the first turn,
preparing for a "fly-by" on the second turn and onwards. Many opponents
will expect you to try and Vector Strike on turn one and attempt to
counter that with their own flyers and unit positioning, so don't fall
for the bait and instead disillusion them by doing it in the turn you
prefer. The Crone may lack the support capabilities of a Harpy when
making a charge, but it nonetheless makes up for it in offensive
prowess; if you do have four or more flying monstrous creatures, don't
be afraid of aggression. I still recommend using the first turn to get
into position so as to not over-extend and end up in the sights of all
the enemies' guns, but if it means sacrificing a cheap monster so the
rest of your swarm can advance unharmed, it may be worth it."You can read more about Hive Crones here.
Spore Mine Clusters
 "Undeniably the only real way to use Spore Mine Clusters as their own
unit is to Deep Strike them. Leaving them in your backfield with the
intention of scaring opponents away from an objective won't work as they
are Toughness 1 models with a single wound per model and no save, other
than applicable cover. Any kind of shooting will kill them pretty much
instantly and even the most paltry shooting will have absolutely no
difficulty getting rid of these things, especially as they are Fearless
and thus cannot go to ground for boosted cover saves. By the same token,
you can't try and move them up the field to be used as a distraction
unit as even the most wasteful shooting from a pitiful ranged unit will
get rid of them before they ever get close enough to do anything.
Remember, Spore Mines are slow, incredibly so. Deep Strike them. The
tactical possibilities you get from Deep Striking them are great and
all, but hey, you can actually get a unit that does something. Isn't
that marvelous?
"Undeniably the only real way to use Spore Mine Clusters as their own
unit is to Deep Strike them. Leaving them in your backfield with the
intention of scaring opponents away from an objective won't work as they
are Toughness 1 models with a single wound per model and no save, other
than applicable cover. Any kind of shooting will kill them pretty much
instantly and even the most paltry shooting will have absolutely no
difficulty getting rid of these things, especially as they are Fearless
and thus cannot go to ground for boosted cover saves. By the same token,
you can't try and move them up the field to be used as a distraction
unit as even the most wasteful shooting from a pitiful ranged unit will
get rid of them before they ever get close enough to do anything.
Remember, Spore Mines are slow, incredibly so. Deep Strike them. The
tactical possibilities you get from Deep Striking them are great and
all, but hey, you can actually get a unit that does something. Isn't
that marvelous?You can read more about Spore Mine Clusters here.
Thank you for reading this article! Please, share your thoughts on the article and the changes I am experimenting with for this series. I am open to any and all feedback! And remember, for any and all discussion on Tyranids and Games Workshop stuff, head on over to +Bell of Lost Souls. Thanks again! Eel out.
No comments:
Post a Comment